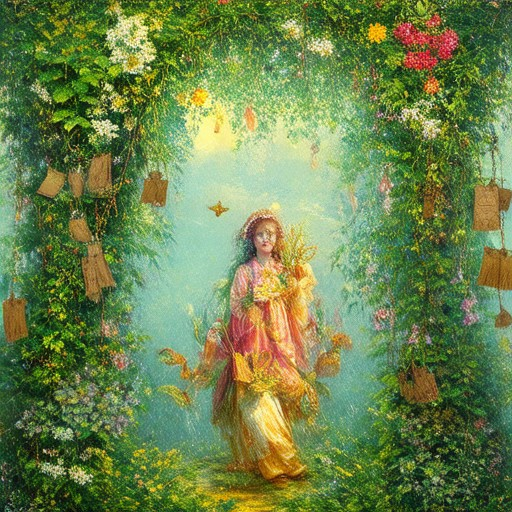
Engaging in DIY projects offers a rewarding way to personalize and customize items tailored to your unique style and needs. Among these creative endeavors, crafting custom DIY seed packets stands out as the perfect way to engage in gardening while adding a sustainable and eco-friendly touch to your home. Whether you’re a seasoned gardener or new to the hobby, creating your own seed packets provides a hands-on opportunity to explore creativity and learn valuable techniques. This guide will walk you through the process of designing and assembling DIY seed packets, ensuring your efforts result in healthy, viable plants. From selecting the right materials to offering planting instructions, we’ll cover everything you need to know to create seed packets that are not only functional but also visually appealing. By taking the time to craft your own seed packets, you’ll gain a deeper appreciation for the art of gardening and the joy of growing your own plants. Let’s dive into the details and discover how to make DIY seed packets that will bring life and beauty to your garden.
Key Takeaways
– Seed Packet Longevity: DIY seed packets typically remain viable for 3-5 years indoors when stored properly. Proper storage is key to maintaining seed viability and ensuring successful growth.
– Factors Affecting Lifespan: Temperature, humidity, sealing methods, and seed type significantly impact seed packet longevity. Storing seeds in a cool, dark place with low humidity is essential.
– Storage Tips: Use silica gel or vacuum-sealed containers for added protection against moisture. Always label seeds with their names and storage date for easy reference.
– Signs of Expired Seeds: Look out for offensive odors, a moldy texture, or failure to germinate after multiple attempts. These indicators signal it’s time to replace your seed packets.
– Historical Insights: Ancient seeds, such as those found in Egyptian tombs and Peruvian sites, highlight the enduring significance of seeds in human history and their remarkable preservation abilities.
– Starting Seeds Indoors: Begin seeds indoors 12–14 weeks before your local frost-free date to ensure healthy transplants. Tailor your approach based on specific plant requirements and environmental conditions.

How to Make Homemade Seed Packets
Creating homemade seed packets is a fun and eco-friendly way to store and share your seeds. Here’s a step-by-step guide to making your own:
Materials Needed
- Paper – Lightweight and durable, such as kraft paper or cardstock
- Seed seeds
- Labels – For writing seed names and planting instructions
- Optional: Desiccant (e.g., silica gel) to keep seeds dry
- Optional: Stickers or stamps for decoration
Step 1: Prepare the Paper
- Cut a sheet of paper into squares or rectangles depending on the size of your seed packets.
- If using origami envelopes, fold the paper to create the shape of the envelope. Secure the sides with tape or glue.
Step 2: Add Seeds
- Place a handful of seeds into each packet.
- For smaller quantities, measure using a teaspoon or tablespoon.
Step 3: Label the Packet
- Write the seed name or variety on the label using permanent marker.
- Include planting instructions, such as light requirements, water needs, and best planting times.
Step 4: Dry the Seeds
- Allow the packets to dry completely to prevent moisture damage to the seeds.
- Optional: Use desiccant to speed up the drying process.
Step 5: Store the Packets
- Store in a cool, dry place until ready to plant.
- Consider organizing them by variety or size for easier access.
Tips for Success
- Test the envelope strength by placing seeds inside and gently shaking.
- Label clearly so you can easily identify each seed type.
- Consider adding a note about the germination rate or source.
Extra Ideas
- Create custom designs by painting or stamping the paper.
- Use recycled materials to minimize waste.
- Add a drawstring closure for extra security.
By following these steps, you can create professional-looking seed packets that are both functional and visually appealing. Share them with friends, family, or local gardening groups to spread the joy of gardening!
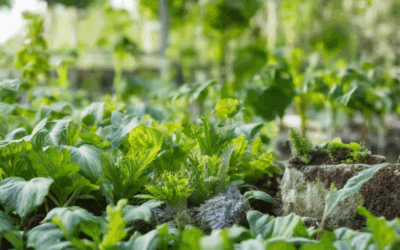
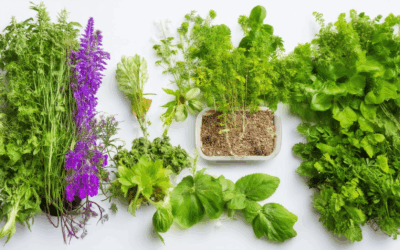
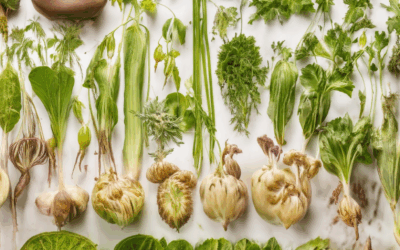
Best Seeds for DIY Seed Paper
When crafting DIY seed paper, selecting the right seeds is crucial for ensuring successful growth and attracting pollinators. Annual flowers are excellent choices due to their vibrant colors and ability to draw in butterflies and hummingbirds. Here’s a curated list of seeds that work well for seed paper:
- Cosmos : Known for their bright blooms and compact growth, cosmos seeds are perfect for creating colorful seed paper.
- Zinnias : These hardy flowers come in various colors and sizes, making them ideal for seed paper projects.
- Alyssum : A low-growing, mat-forming plant, alyssum is great for covering larger areas with its delicate white flowers.
- Petunias : Available in many shades, petunia seeds add a cheerful touch to seed paper and attract pollinators.
- Lantana : A favorite among pollinators, lantana thrives in hot climates and offers a long blooming season.
- Pansies : With their unique shapes and colors, pansy seeds add visual interest to seed paper.
- Daisies : A classic choice, daisy seeds are easy to grow and bring a natural charm to seed paper.
For a diverse and attractive seed paper, consider blending different flower seeds. A mix of cosmos, zinnias, and lantana can create a vibrant tapestry that supports pollinator habitats. Additionally, incorporating native wildflowers can enhance attraction to local pollinators, as they adapt well to specific regions.
Considerations for Seed Selection:
– Choose seeds suited to your climate and growing season.
– Opt for smaller seeds to maximize the number of plants per paper size.
– Select flowers that bloom during peak pollinator seasons, typically spring and summer.
Sample Mix for Pollinator Attraction:
– 50% Cosmos
– 30% Zinnias
– 15% Lantana
– 5% Petunias
Additional Tips:
– Store seeds in a cool, dry place until ready to plant.
– Ensure proper germination conditions, such as moisture and consistent temperature.
If you’re looking for alternative options, consider exploring seed paper products from reputable brands like Botanical Paper Works or The Seed Papers Co . These companies offer high-quality seed papers with a variety of seed options tailored for different purposes.

How to Make a DIY Seed Bomb
Creating a DIY seed bomb is a fun and eco-friendly way to distribute seeds for gardening or wildlife. Here’s a step-by-step guide:
- Materials Needed:
- Clay
- Compost or well-rotted manure
- Heirloom seeds (for diversity and sustainability)
- Water
- Optional: A seed bomb maker or mold
- Preparation:
- Mix 5 parts clay with 1 part compost and 1 part seeds.
- Add a few drops of water to bind the mixture together. Be careful not to add too much water, as it may become too runny.
- Knead the mixture until it becomes smooth and pliable.
- Shaping:
- Flatten the dough and cut it into small pieces.
- Roll each piece into a small ball.
- Drying:
- Place the seed bombs in a shaded area to dry completely, ideally in the sun for several days.
- Planting:
- Gently press each seed bomb into the soil at the intended location.
- Water lightly to help the seeds germinate.
- Wait for the seeds to sprout and grow into plants.
- Tips for Success:
- Use high-quality seeds for better germination rates.
- Consider using heirloom seeds for genetic diversity and resilience.
- If you don’t have a seed bomb maker, you can shape the mixture into small balls manually.
By creating your own seed bomb, you’re contributing to sustainable gardening practices and promoting biodiversity. For more tips on heirloom seeds and sustainable agriculture, visit our heirloom seeds page . Looking for tools to assist in your seed bombing efforts? Check out our gardening tools review for recommendations.

How Long Do Seed Packets Last Indoors?
Seed packets typically remain viable for 3-5 years when stored properly indoors. Their lifespan can vary depending on factors like temperature, humidity, and the type of seed.
Key Factors Affecting Seed Lifespan:
- Temperature: Store seeds in a cool, dark place between 35°F to 50°F . Higher temperatures can speed up germination and reduce viability.
- Humidity: Keep seeds in an airtight container to prevent moisture buildup, which can lead to mold growth and premature sprouting.
- Sealing: Use silica gel packets or vacuum-sealed containers to further reduce moisture and extend seed life.
- Type of Seed: Different seeds have varying storage lifespans. For example, grass seeds may last shorter than vegetable seeds.
Storage Tips:
- Store seeds in a dark, cool cabinet or pantry.
- Avoid exposure to heat sources like ovens or radiators.
- Label seeds with their names and storage date for tracking.
Signs of Expired Seeds:
- Offensive odor
- Moldy texture
- Failure to germinate after several attempts
Best Practices:
- Check for freshness before planting by conducting germination tests.
- Refer to reputable sources like the USDA or gardening forums for specific seed storage guidelines.
The Oldest Known Seeds
The oldest seeds discovered date back thousands of years, offering fascinating insights into ancient agricultural practices. Among the most notable finds:
- Egyptian Tombs: Archaeologists have uncovered seeds in Egyptian tombs that predate Jesus Christ by over 3,000 years. These seeds, believed to be from crops like emmer wheat and barley, provide a glimpse into the agricultural practices of ancient Egypt.
- Peruvian Tigirillo Seeds: Found in Peru, these seeds are estimated to be over 10,000 years old. They offer evidence of early domestication of plants in the Andean region.
- Chinese Neolithic Sites: Seeds recovered from Chinese Neolithic sites suggest that agriculture was well-established there by around 9,000 years ago.
- Mesopotamian Records: Texts from ancient Mesopotamia detail the use of seeds for agriculture, further highlighting the significance of seeds in early civilizations.
These discoveries highlight the importance of seeds in the development of human civilization and demonstrate the remarkable preservation capabilities of certain plant species over millennia. Understanding these ancient seeds contributes valuable knowledge to modern agriculture and genetics studies.
How Far in Advance Should I Start Seeds Indoors?
Your success in gardening begins with proper planning, especially when it comes to starting seeds indoors. The timing can vary significantly depending on your location, climate, and the specific plants you wish to grow.
Determine the Frost-Free Date
The critical factor in deciding when to start seeds indoors is the frost-free date for your area. This is the date after which there is no risk of frost, typically the last day of spring. By understanding this date, you can calculate the ideal time to begin your seedlings indoors.
Example Timeline
For instance, if your frost-free date is around May 15th, you should start your seeds indoors approximately 12–14 weeks before this date. This allows sufficient time for your seedlings to develop strong roots and grow into healthy plants ready for transplantation.
Consider Plant Requirements
Each plant variety has unique needs. Some may require earlier sowing, while others can wait longer. Researching specific plant guides can provide tailored advice for your crops.
Environmental Factors
Ensure your seedlings receive adequate light and maintain the right temperature . Using a heat mat can help regulate conditions for germination and growth.
Transplanting Timing
Monitor your seedlings closely for signs of readiness. They should be well-established, with several sets of leaves, before being moved outdoors. This ensures they adapt smoothly to their new environment.
Protective Measures
Starting seeds indoors offers protection from pests and diseases, contributing to healthier plants. Avoid overcrowding to prevent stress and ensure proper airflow.
Conclusion
By considering your local climate, understanding plant-specific needs, and preparing the right conditions, you can effectively determine the optimal time to start seeds indoors. This careful planning enhances your gardening success and ensures a bountiful harvest.

0 Comments