For gardeners and plant enthusiasts looking to expand their green thumb skills, DIY seed propagation offers a cost-effective and rewarding approach to cultivating new life. By harnessing the power of nature and leveraging simple tools, anyone can successfully germinate seeds at home, unlocking a world of possibilities for gardening enthusiasts of all levels. Whether you’re a seasoned horticulturist or a beginner eager to learn, mastering the art of seed propagation can lead to a bountiful harvest of fresh produce, vibrant flowers, and lush foliage.
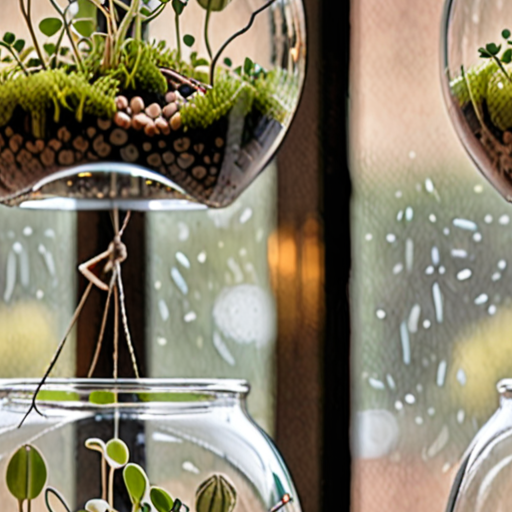
The Best Way to Propagate Seeds
As an avid gardener, I’ve learned that propagating seeds can be a rewarding process that requires patience, attention to detail, and the right techniques.
- Choosing the Right Seeds
- Heirloom seeds, which have been saved and handed down through generations, often offer unique characteristics and adaptability to local conditions.
- Synthetic seeds, created through genetic engineering, may provide improved yields and disease resistance, but can also pose environmental concerns.
- Preparing the Soil
- Add organic matter such as compost or worm castings to enhance soil fertility and structure.
- Mix in perlite or vermiculite to improve drainage and prevent waterlogged soil.
- Sowing Seeds
When selecting seeds for propagation, consider factors such as climate, soil type, and the level of care required for the plant to thrive.
A well-draining potting mix specifically designed for seedlings is essential for successful propagation.
Follow these steps to sow seeds effectively:
- Fill small pots or cell trays with the prepared potting mix.
- Plant seeds at the correct depth, usually 2-3 times their diameter.
- Gently firm the soil around the seeds to prevent settling.
- Water the soil gently but thoroughly.
Provide optimal growing conditions for seedlings, including adequate light, temperature, and humidity.
- Keep the soil consistently moist but not waterlogged.
- Fertilize seedlings with a balanced, water-soluble fertilizer once they have two sets of leaves.
- Transplant seedlings into larger containers or directly into the garden when they have 3-4 sets of leaves.
Be aware of common issues that may arise during seed propagation and take corrective action:
- Damping off: caused by fungal infections, treat with fungicides and improve air circulation.
- Overwatering: reduce watering frequency and ensure good drainage.
- Pests: control infestations with neem oil or insecticidal soap.
By following these guidelines and staying attentive to the needs of your seedlings, you’ll be well on your way to successfully propagating seeds and enjoying a bountiful harvest.
Germinating Seeds DIY
As an avid gardener, I’ve found that germinating seeds can be a fun and rewarding process, allowing me to connect with nature and nurture my plants from the very beginning.
- Materials Needed:
- Paper towels
- Water
- A clean container
- A warm location with indirect light
- A timer or clock
- A pencil or marker
- A piece of cardboard or a paper plate
To start, I’ll need to prepare my materials. I’ll begin by cutting a piece of cardboard or a paper plate to fit inside my container, leaving enough room for the paper towel to absorb water.
- I’ll then place a sheet of paper towel in the container, making sure it’s large enough to cover the entire surface.
- Next, I’ll pour water onto the paper towel, making sure it’s evenly saturated but not too wet.
- Now, I’ll carefully place the seeds on the paper towel, spacing them out evenly to allow for proper growth.
- Once the seeds are in place, I’ll cover the container with plastic wrap or a damp cloth to maintain humidity and promote germination.
- Finally, I’ll place the container in a warm location with indirect light, such as a sunny windowsill or under grow lights, and set a timer to check on the seeds every few days.
As the seeds begin to sprout, I’ll transfer them to individual pots filled with a well-draining potting mix, making sure to handle them gently to avoid damaging the delicate roots.
With patience and care, I’ll watch my seeds grow into strong, healthy seedlings, ready to thrive in their new environment.
By following these simple steps, you can successfully germinate seeds DIY and enjoy the satisfaction of nurturing your own plants from the very beginning.
Tips and Variations:
- For faster germination, try using a heating mat or a warm water bath to speed up the process.
- To increase humidity, you can cover the container with a clear plastic bag or a cloche.
- Experiment with different types of paper towels or materials, such as coffee filters or cotton balls, to see which works best for you.
- Keep the container away from drafts and extreme temperatures to promote optimal germination.
Common Issues and Solutions:
- Dryness: Check the paper towel regularly to ensure it remains moist but not waterlogged.
- Mold: If mold appears, discard the affected area and start again with fresh materials.
- Lack of Growth: Adjust the temperature, lighting, or watering schedule to optimize conditions for germination.
Is it Better to Germinate Seeds in Soil or Paper Towel?
When it comes to germinating seeds, many gardeners wonder whether to use soil or paper towels.
- Paper towels offer excellent absorbency and cleanliness, making them ideal for seed germination.
- Soil, on the other hand, provides a more natural environment for seeds to grow, but it can be messy and may harbor diseases.
Pros of Using Paper Towels:
- Easier to control moisture levels
- Less risk of disease transmission
- Cleaner and less messy
Cons of Using Paper Towels:
- May not provide enough oxygen for seed growth
- Can dry out quickly, leading to seed death
Pros of Using Soil:
- Provides a natural environment for seed growth
- Offers better aeration and drainage
- Supports healthy root development
Cons of Using Soil:
- Can be messy and difficult to clean
- May harbor diseases and pests
- Requires more maintenance and care
Choosing the Right Method:
Ultimately, the choice between using paper towels or soil for seed germination depends on personal preference and specific needs.
If you’re looking for a low-maintenance and easy-to-use method, paper towels may be the better choice.
However, if you prefer a more natural approach and are willing to invest time and effort into caring for your seeds, soil may be the way to go.
At Old Seed , we recommend experimenting with both methods to find what works best for you and your unique gardening style.
Can I Just Throw Seeds on the Ground?
As an avid gardener, you’re likely eager to get started with planting seeds, but have you ever wondered whether simply throwing them on the ground is enough? In this article, we’ll explore the ins and outs of seed sowing and provide you with expert advice on how to give your seeds the best chance of success.
- Understanding Seed Sowing Basics
- Seeds require specific conditions to germinate and grow, including adequate light, water, temperature, and soil quality.
- Avoid throwing seeds on the ground without preparing the soil first, as this can lead to poor germination rates and weak seedlings.
- Choose a location with well-draining soil and full sun to partial shade, depending on the type of plant you’re growing.
- Mix in organic matter like compost or manure to enrich the soil and support healthy root development.
The Importance of Soil Preparation
Suitable soil preparation is crucial for successful seed sowing. Here are some essential steps to take:
- Dig the area to a depth of about 8-10 inches, loosening the soil to allow roots to grow freely.
- Add a 2-inch layer of compost or well-rotted manure to improve soil fertility and drainage.
- Rake the soil gently to create a smooth surface, removing any debris or weeds.
- Create shallow furrows or holes, depending on the type of seed you’re planting, and sow the seeds according to package instructions.
Additional Tips for Successful Seed Sowing
To maximize your chances of success, consider the following tips:
- Select high-quality seeds from reputable suppliers to ensure optimal germination rates.
- Water the soil gently but thoroughly after sowing, and keep the soil consistently moist during the germination period.
- Thin out seedlings to prevent overcrowding and promote healthy growth.
- Monitor weather conditions and protect your plants from extreme temperatures, wind, and pests.
Conclusion is Not Required
Can You Just Throw Seed Down?
When it comes to planting grass seed on hard dirt, many people wonder if they can simply throw some seeds onto the ground and expect a lush, green lawn.
- No, throwing seed down without preparing the soil is unlikely to result in a successful lawn.
- The seeds may germinate, but they won’t have enough nutrients or support to grow into healthy, dense turf.
Why Preparing the Soil Matters
Before planting grass seed, it’s essential to prepare the soil to give the seeds the best chance of success.
- Till the soil: Loosen the top layer of soil to a depth of about 8-10 inches to remove any debris, rocks, and compacted layers.
- Add organic matter: Mix in compost, well-rotted manure, or peat moss to improve soil structure, fertility, and drainage.
- Rake the soil to create a smooth, even surface.
- Spread the grass seed evenly over the prepared soil, following the package instructions for the recommended seeding rate.
Key Considerations for Successful Lawn Establishment
To increase the chances of a successful lawn establishment, consider the following factors:
- Different types of grass require specific soil conditions, so choose a grass species suitable for your soil type.
- Select a grass species that thrives in your local climate and temperature range.
- Regular mowing, watering, and fertilizing are crucial for a healthy, dense lawn.
Additional Tips for Success
For optimal results, remember to:
- Water the soil gently but thoroughly after sowing the seeds and during the germination period.
- Most grass species require at least 6 hours of direct sunlight per day.
- Regularly remove weeds by hand or with a non-selective herbicide to prevent competition for water and nutrients.
Conclusion is Not Needed
Scattering Zinnia Seeds
When it comes to planting zinnias, many gardeners wonder whether they can simply scatter the seeds.
- Sprinkle the seeds evenly over the prepared soil.
- Gently rake the soil to a depth of about ¼ inch to ensure good contact between the seeds and the soil.
- Water the area gently but thoroughly.
- Keep the soil consistently moist during the germination period, which usually takes 7-10 days.
While scattering zinnia seeds can work, it’s often more effective to plant them individually or in small groups.
- This allows for better control over spacing and ensures that each seed has enough room to grow.
- Plant the seeds about ¼ inch deep and 6-12 inches apart, depending on the variety.
- Water the soil gently but thoroughly after planting.
- Maintain consistent moisture levels until the seeds germinate and the plants are established.
Regardless of the method, make sure to choose a location with full sun and well-draining soil for optimal growth.
Tips for Successful Germination
- Choose fresh seeds for the best results.
- Avoid sowing seeds too deeply, as this can lead to poor germination rates.
- Keep the soil consistently moist during the germination period.
- Thin out seedlings to prevent overcrowding and promote healthy growth.
Conclusion
By following these steps and tips, you can successfully scatter zinnia seeds and enjoy a beautiful display of colorful blooms in your garden.

0 Comments